


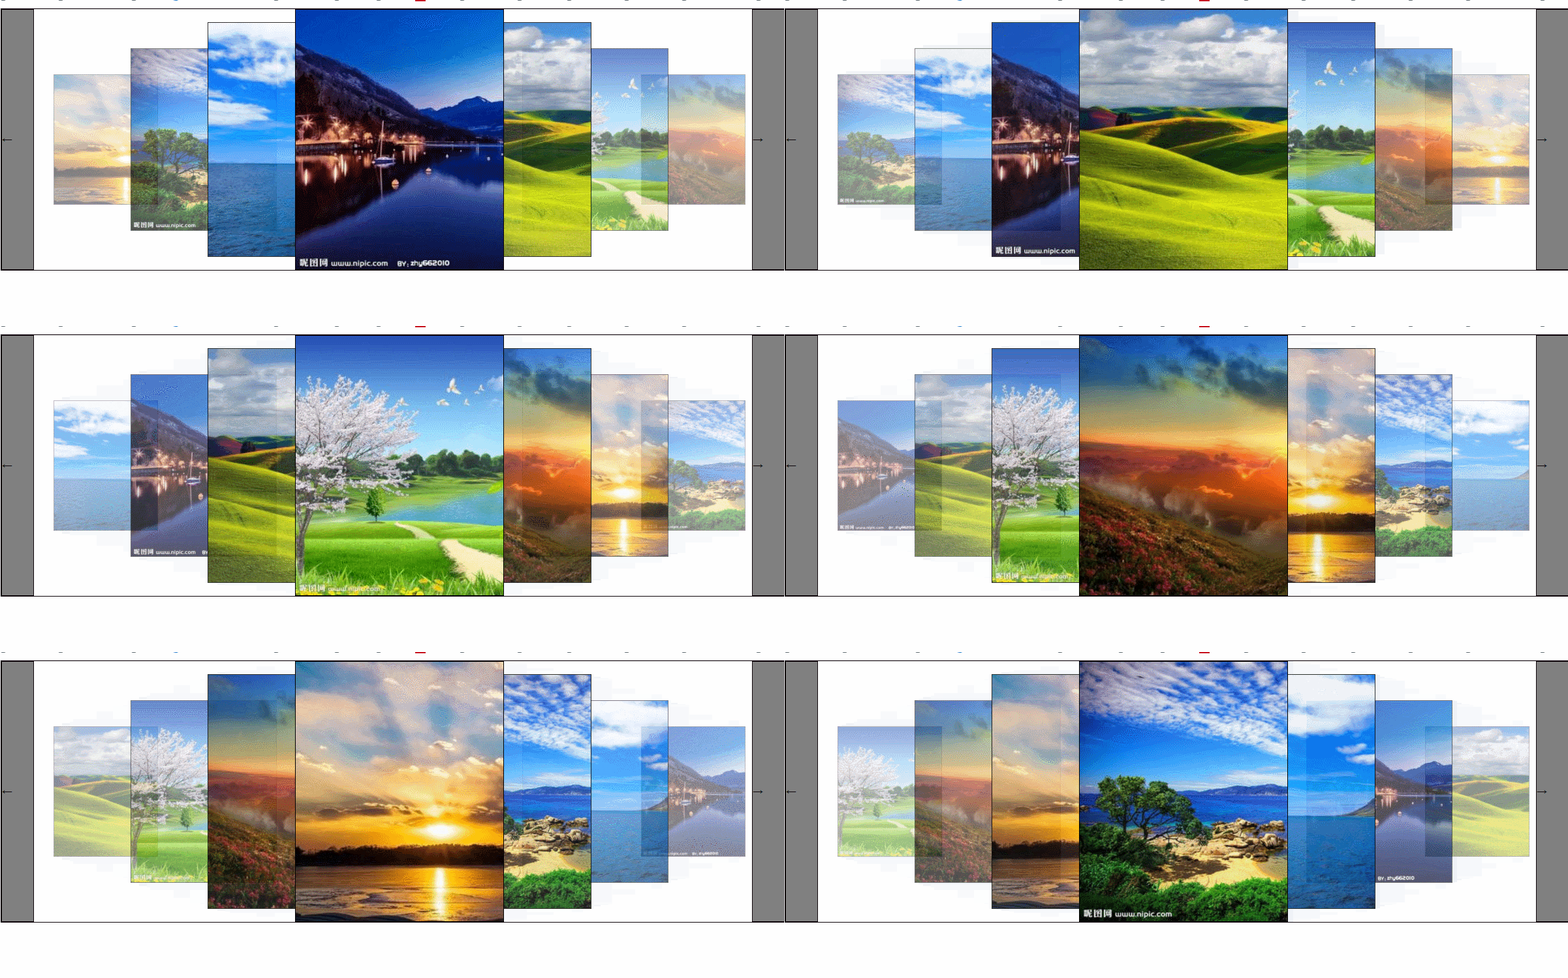
效果:
轮播图在向一个方向移动的同时,要对其每一个图片的大小,位置,透明度以及层级进行改变
原理:
轮播图向左移动时将第一个子元素剪切到末尾,轮播图向右移动时,将末尾子元素剪切到最前面,以此实现无缝轮播效果,再因为li剪切后,下一个li会补上(例如第一个子元素被剪切到最后时,第二个字元素会补上成为第一个子元素),所以li下标不变,以次来修改每一个位置的li的属性(大小,位置,透明度,层级)
HTML代码:
    ←
  //用一个div存放一个ul,并对ul里的每一个li进行初始样式设置
CSS代码:
 *{
     margin: 0;
     padding: 0;
     list-style: none;
 }
 .albumBox{
     width: 1200px;
     height: 400px;
     margin: 0 auto;
     border: 1px solid #000;
 }

 .smallBox{
     height: 400px;
     line-height: 400px;
     position: relative;
 }
 .smallPicBox{
     width: 1100px;
     height: 400px;
     float: left;
     position: relative;
 }
 .smallPicBox ul{
     width: 100%;
     height: 400px;
 }
 .smallPicBox li{
     width: 320px;
     height: 400px;
     float: left;
     border: 1px solid #000;
     box-sizing: border-box;
 }
 .smallBox .current::after{
     content: "25b2";
     position: absolute;
     top: -31px;
     left: 70px;
     color: red;

 }
 .arrowLeft{
     width: 50px;
     height: 400px;
     position: absolute;
     left: 0;
     border: 1px solid #000;
     box-sizing: border-box;
     background-color: gray;
     z-index: 10;
 }
 .arrowRight{
     width: 50px;
     height: 400px;
     position: absolute;
     right: 0;
     border: 1px solid #000;
     box-sizing: border-box;
     background-color: gray;
     z-index: 10;
 }
JS代码:
注:本例js是直接写在body里的,也可以单独写一个js文件,在引入到html界面
效果图:
到此这篇关于HTML+CSS+JS实现堆叠轮播效果的示例代码的文章就介绍到这了,更多相关HTML+CSS+JS实现轮播内容请搜索考高分网以前的文章或继续浏览下面的相关文章,希望大家以后多多支持考高分网!



